The Managed Extensibility Framework (MEF) from Microsoft is a framework that allows developers to create a plug-in based application that allows for designing extensible programs by either the developer or third parties. The definition from MSDN is as follows (link):
It allows application developers to discover and use extensions with no configuration required. It also lets extension developers easily encapsulate code and avoid fragile hard dependencies. MEF not only allows extensions to be reused within applications, but across applications as well.
At first glance, it looks like just another IoC container, and it certainly can be used for dependency injection much the same as Ninject or other DI frameworks. But the true power comes when you realize that your dependencies can come from anywhere and be loaded and run at any time, and that is the true purpose of MEF. It allows you to create libraries or pieces of functionality in isolation that perform a very specific functionality (as well as unit test them isolation as well), and then plug them in to a much larger application. This gives you very clean separation of concerns in your code, and allows developers to focus on smaller projects simultaneously and deliver a final product to the client that much faster.
Scope
This document will focus on explaining the concepts behind MEF, how it works and how to get started using a basic console application as a tutorial of sorts. It assumes a mid-level knowledge of ASP.NET and C#, as well as some basic understanding of how IoC containers work in order to understand the magic that can happen when working with MEF.
Attributed vs. Convention based programming model
There are two main ways of working with MEF to create a plug-in based application. In most cases (and with most tutorials you will find online), you will use an attribute based model, wherein you apply attributes to your classes, methods and properties to determine how pieces are composed within MEF. The first part of this article will cover the attributed programming model in detail.
The other way in which you can use MEF is with a convention based approach. This allows you to not have to apply attributes all over your code to define how pieces are composed, and rather create a set of rules that determines what is composed and what is not. The second part of this article will cover the convention based model in less detail, but enough to give you an idea of how it works and let you make your own decision on how you want to work with MEF.
Nuts and Bolts
Everything concerning MEF lives inside the System.ComponentModel.Composition namespace, which is part of the .NET 4 library, and are located in the GAC. This root namespaces houses the attributes that we will be using to define how we compose our separate pieces, as well as some exception classes that are needed.
Underneath this namespace is the System.ComponentModel.Composition.Hosting namespace, which contains all the classes that we need to start working with MEF. There are two initial concepts to introduce:
- CompositionContainer – This class is where all the magic happens. You will gather all of your needed pieces (explained below) in a CompositionContainer, which takes care of putting it all together.
- Catalogs – The concept of a catalog is to basically tell the composition container how and where to get your pieces. There are many catalogs available for defining a directory to look in, a specific assembly, as well as an AggregateCatalog that contains any number of different catalogs.
The idea is to define one or more catalogs (usually with an AggregateCatalog), and then pass the catalog(s) to the constructor of the composition container, and then call ComposeParts on the container, which does all the work of injecting dependencies.
Imports and Exports
So how do we define what gets composed and how? That all happens with Import and Export attributes on your classes, methods and properties. These two attributes live in the System.ComponentModel.Composition.Hosting namespace.
What you want to do is to label anything that you want to be composed with an Export attribute using the type you want to export as. This is usually an interface you define (remember, always program to an interface, not an implementation), which you will then import as a property of a class using the Import attribute in the class/application you want to consume that dependency. I think this is best illustrated with a small example.
The MessageSender Application
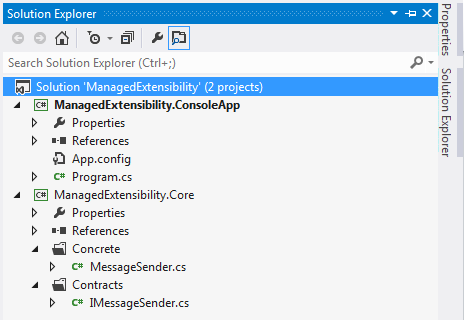
Fire up Visual Studio. Create a new console application ensuring that you are targeting the .NET 4 framework at least (4.5 is fine if you have VS2012 installed). The name I chose was ManagedExtensibility.ConsoleApp. Once you’ve done that, add a reference to System.ComponentModel.Composition. This is located in the global assembly cache, so no need to pull down a Nuget package. Add a new class library to your solution to house your contracts (interfaces) and concrete classes (implementation). I named mine ManagedExtensibility.Core. Be sure to also add a reference to System.ComponentModel.Composition in this project as well. I created two folders named “Contracts” and “Concrete” to my class library. In my Contracts folder, I added a new interface named “IMessageSender” and gave it a single method that returns a string called “SendMessage”. In my “Concrete” folder, I created a new class that implements the IMessageSender interface, and implemented the interface to return “This is a default message.” in the SendMessage method. Your project structure should look similar to Example 1:
Your IMessageSender interface should look like this:
public interface IMessageSender
{
    string SendMessage();
}
Your concrete class should look like this:
using Contracts;

public class MessageSender : IMessageSender
{
    public string SendMessage()
    {
        return "This is a default message.";
    }
}
Still nice and simple. Nothing fancy going on here. To start getting a feel for what we’re going to do, add a using statement in your concrete implementation for System.ComponentModel.Composition.Hosting, and add the following attribute to the MessageSender class like so:
[Export(typeof(IMessageSender))]
Your class should now look something like this:
using System.ComponentModel.Composition;
using Contracts;

[Export(typeof(IMessageSender))]
public class MessageSender : IMessageSender
{
    public string SendMessage()
    {
        return "This is a default message.";
    }
}
Still simple. All we’ve done is declare that we want to export this class as a type of IMessageSender. The real magic, however, happens inside of our console application, where we pull this in. To do this, we will first need to add a project reference to the console application project for our core library (whatever you happened to name it). Next, open the Program.cs file in your console app, add two using statements for System.ComponentModel.Composition and System.ComponentModel.Composition.Hosting, as well as a using statement for the Contracts namespace in your core library. Note that we are not using the concrete implementation, we are simply referencing our contract.
Next, we need to wire up some code in the Program class. The inner workings of your class should look like so:
using System;
using System.ComponentModel.Composition;
using System.ComponentModel.Composition.Hosting;
using ManagedExtensibility.Core.Contracts;

namespace ManagedExtensibility.ConsoleApp
{
    class Program
    {
        [Import(typeof(IMessageSender))]
        public IMessageSender MessageSender;

        private readonly CompositionContainer _container;

        static void Main(string[] args)
        {
        }
    }
}
So what we’re doing is we are saying that we want to import a type of IMessageSender and inject it into our MessageSender property. We are also declaring our composition container for use, so let’s use it. Add a private constructor and add the following code, which I will explain below:
private Program()
{
    AggregateCatalog catalog = new AggregateCatalog();
    catalog.Catalogs.Add(new DirectoryCatalog(Environment.CurrentDirectory));
    _container = new CompositionContainer(catalog);

    try
    {
        _container.ComposeParts(this);
    }
    catch(CompositionException compositionException)
    {
        Console.WriteLine(compositionException.ToString());
        Console.ReadLine();
    }
}
So what we’re doing here is easily explainable. The first line declares an AggregateCatalog, which can hold one or more different catalogs (even other aggregate catalogs, but that’s a bit beyond the scope of what we’re doing). To that catalog we are adding a DirectoryCatalog and telling it to look in the current directory, which is our bin directory. We can do this for this example because we’ve added a project reference to our core library, so we know it will be there. Other catalogs include an AssemblyCatalog, where you provide it the name of an assembly to scan. This is useful if you don’t want to load in every assembly in your project. You can see all the other catalogs by visiting the MSDN site for the System.ComponentModel.Composition.Hosting namespace (link).
Next, we simply instantiate our composition container and give it the catalog. The magic happens in the following try/catch statement. When we call “ComposeParts” and give it the instance of our application, it will look at any import attributes we’ve used, and then look through the catalogs we gave it to find a matching export. In our simple example, the only requirement to being a matching export is implementing IMessageSender, but it could get much more complicated (such as metadata, which we’ll cover below). For right now, it will see our concrete MessageSender class and satisfy that import with an instance of that class.
We need to wrap this in a try/catch because if any imports are not satisfied properly, it will throw an exception. There is a tool to help you diagnose those issues called Mefx which we will cover towards the end. But for now we’re just going to spit out the exception to the console should anything untowards happen.
And that’s the meat of setting up MEF. To see the fruits of our labor, add the following code to the Main method:
static void Main(string[] args)
{
    Program p = new Program();
    Console.WriteLine(p.MessageSender.SendMessage());
    Console.ReadLine();
}
That’s it! Now run the console app and you should see the following output:
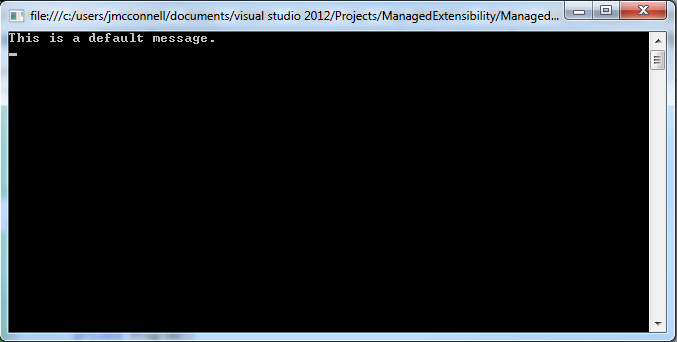
And here you will see the string we used in our concrete implementation of our interface. This happened because we stated that we wanted to export our concrete implementation as a type of IMessageSender, and in our console app we basically said “Find me a class that implements IMessageSender in any assembly in our current directory and assign it to this property”. Which works just fine if we know ahead of time there will only be one class exported as that type. But what if there are more? Well, here’s how we do that.
ImportMany
We’re going to flesh out our little message sender here a little bit to show how we can export and import many instances of a contract. To do that, add a new interface to the Contracts folder in your core library called “IMessage” and give it a single property of type object called MessageValue with only a get accessor. It should look like this:
public interface IMessage
{
    object MessageValue { get; }
}
Next, update the SendMessage method in the IMessageSender interface to take a parameter of type IMessage:
string SendMessage(IMessage message);
Also, update the concrete MessageSender implementation to allow for this parameter:
public string SendMessage(IMessage message)
{
    return message.MessageValue.ToString();
}
So now we can provide a message object to our message sender. So let’s provide some concrete implementations for our IMessage interface. In your Concrete folder, create a class called StringMessage that implements IMessage, and have it return “String Message”:
[Export(typeof(IMessage))]
public class StringMessage : IMessage
{
    public object MessageValue
    {
        get { return "String Message"; }
    }
}
Add another class called IntegerMessage that implements IMessage and have it return 12345:
[Export(typeof(IMessage))]
public class IntegerMessage : IMessage
{
    public object MessageValue
    {
        get { return 12345; }
    }
}
So now we have a couple of different types of messages we can send, so let’s see how we can put it all together. Open up Program.cs and add a new property to the Program class:
[ImportMany]
public IEnumerable<Lazy<IMessage>> Messages;
So in order for us to compose many different implementations, we simply use the ImportMany attribute to declare that we are expecting any number of classes that have been exported as a type of IMessage. The Lazy<IMessage> is lazy initialization functionality built into MEF, and we’ll find out in the next section why we are using this. The class definition for Lazy<T> contains a T Value property, which gives us access to the object we want. For now, take it as a given that we are using lazy initialization. Next, all we have to do is change up our logic in the Main method to loop through each message, give it to our message sender, and output the value:
Program p = new Program(); // unchanged
foreach (Lazy<IMessage> msg in p.Messages)
{
    Console.WriteLine(p.MessageSender.SendMessage(msg.Value));
}
Console.ReadLine();
So now if we run our console application, we should see the following output:

Metadata
So far, all we’ve done is import whatever classes happened to be exported as our given contracts IMessageSender and IMessage. But what if we want to know what kind of IMessage we have at runtime? Well, we could use reflection, but that’s rather inefficient and ugly. Or, we could provide some metadata for our exports to give us some more insight as to what exactly we are dealing with. Luckily, MEF provides us the ability to provide metadata information rather easily.
To start, we’ll create another interface called “IMessageMetadata” in our Contracts folder with a string property called “MessageType”:
public interface IMessageMetadata
{
    string MessageType { get; }
}
This interface is what is referred to as a metadata view, which declares what metadata will be available when we export. Also important to note is that in order to use the built-in metadata functionality, an import must be lazy, which is why we used the Lazy<IMessage> implementation previously.
Now, in order to provide metadata information that will be exported, we need to add another attribute to our concrete implementations. Add the following attributes to our StringMessage and IntegerMessage classes respectively:
[Export(typeof(IMessage))]
[ExportMetadata("MessageType", "String")]
public class StringMessage : IMessage
{
    ...
}
[Export(typeof(IMessage))]
[ExportMetadata("MessageType", "Integer")]
public class IntegerMessage : IMessage
{
    ...
}
In most cases, all of the properties defined in a metadata view are required in order for an export to be satisfied. You can, however, provide a default value using the [DefaultValue(…)] attribute on a property in your metadata view so that if the metadata property is not provided with the ExportMetadata attribute, it can still contain a value. For our concerns, however, we won’t be needing that as we only have a simple one property metadata view.
Now that we’ve setup our metadata information, let’s build in some logic to use it. First, we have to modify our Messages property to include the metadata. We do that by changing the property to indicate that we are not only importing IMessage instances, but also IMessageMetadata:
public IEnumerable<Lazy<IMessage, IMessageMetadata>> Messages;
In Program.cs, replace the following code in our Main method:
Program p = new Program(); // unchanged
Console.WriteLine("--- SELECT A MESSAGE TYPE ---");
Console.WriteLine("--- Press 1 for String ---");
Console.WriteLine("--- Press 2 for Integer ---");
var mType = Console.ReadLine();
IEnumerable<Lazy<IMessage, IMessageMetadata>> requestedMessage = null;

if (string.IsNullOrEmpty(mType)) return;
switch (mType)
{
    case "1":
        requestedMessages = p.Messages.Where(x => x.Metadata.MessageType.Equals("String"));
        break;
    case "2":
        requestedMessages = p.Messages.Where(x => x.Metadata.MessageType.Equals("Integer"));
        break;
    default:
        requestedMessages = p.Messages;
        break;
}

foreach (Lazy<IMessage, IMessageMetadata> msg in requestedMessages)
{
    Console.WriteLine(p.MessageSender.SendMessage(msg.Value));
}
Console.ReadLine();
So let’s take a look at what we’re doing. First we’re outputting some instructions to the console and then reading in the user value. Next, we create a new variable to hold the messages that the user wants to see. Then we have a simple switch statement to evaluate the type of message. Just like how Lazy<T> gave us a handy T Value property, Lazy<T, TMetadata> has a handy T Metadata property for us to look at the metadata object. So now we can filter out our requested messages based on the metadata, and only return those messages.
If you run the console app and press “1” at the prompt, you should see the following:

Plug-In Magic Awesomeness
Now you may be asking the question “How is this different than any other IoC container?” And that’s a valid question. All we’ve done so far is nothing more than, say, Ninject can do. The beauty comes with the way composition works. In our usage, we are telling our DirectoryCatalog to scan our current directory, which means if we wanted to, we could drop in an assembly (or in a real-world example, read an assembly in from disk or database when a user makes a certain action), and when composition happens, it will pick it up.
In order to emulate this, we’ll simply create a new class library in our project that will contain a third message type. So create a new class library in your solution, add a reference to System.ComponentModel.Composition as well as the core library that contains our contracts. Then create a new BooleanMessage class like below:
[Export(typeof(IMessage))]
[ExportMetadata("MessageType", "Boolean")]
public class BooleanMessage : IMessage
{
    public object MessageValue
    {
        get { return true; }
    }
}
Make sure to compile your new class library so it generates a .dll file. Now, let’s update our console app to allow for the possibility of a third message type. Update the switch statement by adding the following:
case "3":
    requestedMessages = p.Messages.Where(x => x.Metadata.MessageType.Equals("Boolean"));
    break;
Now we also need to wrap our foreach loop in a check to see if we actually returned any messages:
if (requestedMessages.Any())
{
    foreach (Lazy<IMessage, IMessageMetadata> msg in requestedMessages)
    {
        Console.WriteLine(p.MessageSender.SendMessage(msg.Value));
    }
}
else
{
    Console.WriteLine("No messages found for the requested message type.");
    Console.ReadLine();
}
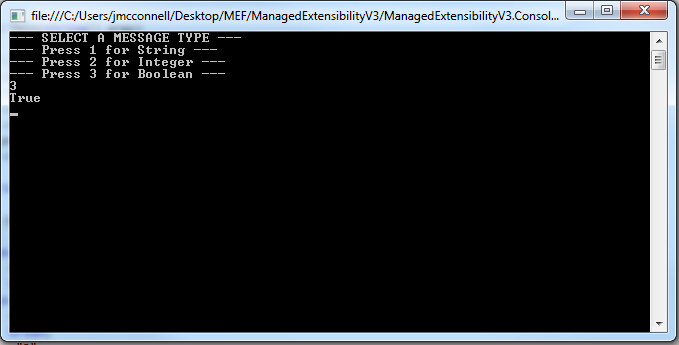
If we run this app now and press 3 for Boolean, we should see the following:

Since our bin directory did not contain our new class library, it didn’t pick up our BooleanMessage class. This is why we put the class in a separate library. Close the console window, open up a new Explorer window and navigate to the bin directory of the new class library project that contains our BooleanMessage. Copy the .dll and paste it into the bin directory of our console app project. Now run the console app again and press 3 for Boolean:
Voila! It picked it up because when the app started up, it looked in the current directory (its own bin directory) and found it because we manually dropped it there. This was really just to simulate how the plug-in aspect works. You could just as easily have read the assembly off disk or from a database at runtime and do your composition then. This truly shows the power of MEF and how it is so much more than just another IoC container.
Debugging
So how would we debug? A lot can go wrong during composition, such as imports and exports not being satisfied because of missing attributes. Luckily, there is a tool that allows you to at least get some more information. It’s not pretty, but it does work. I won’t go into too much detail in this article, but visit this link (http://msdn.microsoft.com/en-us/library/ff576068.aspx) to learn more about Mefx. Microsoft calls it a “composition analysis tool”, which is an apt name. It’s a console application that when given certain arguments on the command line such as your assemblies, it will tell you all of the parts the composer picked up, as well as the ability to list out any rejected parts, which are imports and exports that were not satisfied. Usage and learning of the tool is left to the reader, as it is beyond the scope of this article.
Convention Based Programming Model
One of the drawbacks to the Attributed Based Programming Model that we’ve just went over is the sheer number of attributes that have to be applied to classes. It can get a bit cumbersome. To get around that, you can compose your application by convention. That is, to say, you define what types you want to be composed and let MEF do the rest.
To learn more, visit this MSDN article (http://msdn.microsoft.com/en-us/library/hh925579.aspx), which will introduce you to the concept of a RegistrationBuilder and a PartBuilder, which you can use to define what gets composed and what doesn’t.
Conclusion
In conclusion, I hope you’ve learned about a new and exciting framework that gives you yet another tool in your belt. Remember, MEF is not a hammer, and nor should everything start to look like a nail. It is a framework with a very specific purpose so always inspect your needs in detail to see if MEF is a solution that will work for you.

When explaining things to people learning (as this page attempts to do), it would be helpful to explain things fully. For example, this page says to add a reference, but doesn’t tell you how to do that. When researching how to add a reference, I found that microsoft says “You cannot add references from the global assembly cache because it is strictly part of the run-time environment.” on page https://msdn.microsoft.com/en-us/library/wkze6zky%28v=vs.110%29.aspx. That seems to contradict the instructions here which state “add a reference to System.ComponentModel.Composition. This is located in the global assembly cache, so no need to pull down a Nuget package. ” and WTF is a “nuget package”